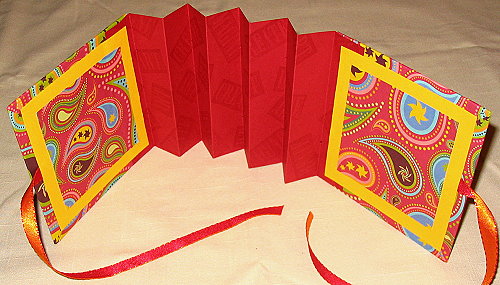
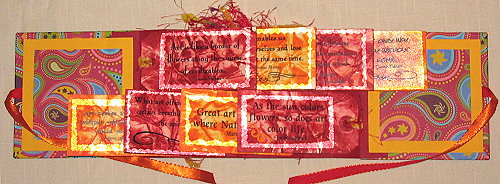
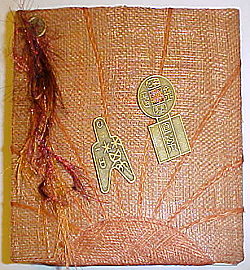
Tag Flag Book

By Marianne Colschen
Supply List:
- 8 Tags 2 1/8" x 4 1/4"
- 2 Cardboard pieces 4 1/2" x 4 1/2" (use cardboard from a paper pad, cereal box or whatever you have handy)
- 2 Decorated paper pieces for covering cardboard (stamp your own or use printed, decorative papers) 5 1/2" x 5 1/2"
- 4 5/8" x 10" paper for spine
- Bone folder
- Awl/push pin
- O'So Sticky tape
- Micro Beads
- Stamps and ink pads
- Fibers and/or Ribbons
- Embellishments


Directions:
Note:
The measurements listed below are for a 4 1/2" square Flag Tag Book made with 2 1/8 x 4 1/4" tags (size #4). You can use any size of tags you will just need to adjust your accordion spine and covers. The end with the hole will go towards the spine.
The measurements listed below are for a 4 1/2" square Flag Tag Book made with 2 1/8 x 4 1/4" tags (size #4). You can use any size of tags you will just need to adjust your accordion spine and covers. The end with the hole will go towards the spine.
Step 1:
Take cardboard pieces and 2 Decorated paper pieces for covering cardboard 5.5" x 5.5". If you have a pattern that is not random make sure you have the paper facing the right direction. Lay the pattern piece down first then the cardboard pieces on top. Center the cardboard as best you can.
Miter the corners as shown in the photo. Be sure your folds are crisp. Put a small piece of O'So tape on the square part of the decorative paper. Peel off the liner and stick the paper back in place. Do this to all four corners - both the front and back covers. - Now put pieces of O'So tape along the long ends of the decorative paper and fold over unto the cardboard. Set your covers aside.
Step 2:
Take the 4 5/8" x 10" paper for spine. If you want to decorate the spine (accordion) do it know. It is much easier to do before you start the folding. After you are done decorating fold the spine so you have 1" wide folds.
You will note there are 4 mountain folds and 5 valley folds. If you have holes in your tags and plan on using fibers/ ribbons along the spine, use your pushpin or awl poke holes in the valley folds 1 1/8" from the top and the bottom. If you do not have holes in your tag move onto the next step.
Step 3:
Stamp and decorate the tags. 4 tags will be decorated with the tag holes facing to the right and 4 tags will be decorated with the holes to the left. If you don't have holes and are using just rectangles be sure you have your stamped images with 4 facing right and 4 facing to the left.
Stamp and decorate the tags. 4 tags will be decorated with the tag holes facing to the right and 4 tags will be decorated with the holes to the left. If you don't have holes and are using just rectangles be sure you have your stamped images with 4 facing right and 4 facing to the left.
Step 4:
With your accordion spine facing you - make sure you have 4 mountain folds and 5 valley folds. Using O'So Sticky tape attach the first valley fold section to the left hand cover. Put the fold just a smidge inside the cover on the right side. On the back cover do the same but your accordion will be on the left side of the cover.
Cut ribbon or fiber to use a tie for your book. Mine are approx. 9" long. You will notice in the picture on the left side a piece of O'So Sticky Tape. Peel off the liner and place your ribbon here. You would do the same thing on the right hand cardboard cover but with the tape on the other side. Attach your 2 decorated paper pieces for covering the inside of your cardboard covers.

Step 5:
Okey dokey now we will add the tags. For those not using ribbons or fibers along the spine do the following: Take your tags and lay them out in the two rows as you want them to appear in your book. Put a small piece of O'So Stick tape near the hole on the backside of each tag. Remove the liner from the first tag. Insert the tag (the first one on the top row) in the valley between the cover and the accordion. The next tag on the top will go in the next valley fold and you will continue this until all 4 tags are done on the top row.
Okey dokey now we will add the tags. For those not using ribbons or fibers along the spine do the following: Take your tags and lay them out in the two rows as you want them to appear in your book. Put a small piece of O'So Stick tape near the hole on the backside of each tag. Remove the liner from the first tag. Insert the tag (the first one on the top row) in the valley between the cover and the accordion. The next tag on the top will go in the next valley fold and you will continue this until all 4 tags are done on the top row.
Step 6:
For the bottom 4 tags the first one will go in the second valley fold facing to the left. You will continue adding the tags one in each valley fold across the bottom. Your last tag will end in the last valley fold next to the back cover.
If you are adding fibers/ribbons to your spine here are your instructions: Add the fiber to your tag hole. Take your tags and lay them out in the two rows as you want them to appear in your book. Put a small piece of O'So Sticky tape near the hole on the backside of each tag.
Step 7:
With a needle or floss threader take the ends of the ribbon or fiber and put them through the first hole on the top that you punched in Step 2. This will be the first valley fold. Remove the liner from the O'So Sticky Tape and press into the valley fold. See photo above. Do this for all the top row tags.
With a needle or floss threader take the ends of the ribbon or fiber and put them through the first hole on the top that you punched in Step 2. This will be the first valley fold. Remove the liner from the O'So Sticky Tape and press into the valley fold. See photo above. Do this for all the top row tags.
Step 8:
For the bottom 4 tags the first one will go in the second valley fold facing to the left. You will continue adding the tags one in each valley fold across the bottom. Your last tag will end in the last valley fold next to the back cover.
For the bottom 4 tags the first one will go in the second valley fold facing to the left. You will continue adding the tags one in each valley fold across the bottom. Your last tag will end in the last valley fold next to the back cover.
Step 9:
You can tie the fibers in the back at the holes or just let them hang loose. Trim the fibers as desired. Then decorate the cover of your book.
You can tie the fibers in the back at the holes or just let them hang loose. Trim the fibers as desired. Then decorate the cover of your book.
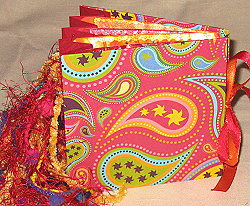
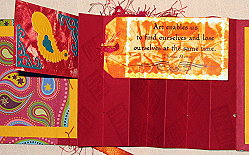
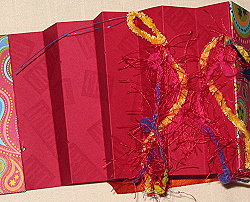
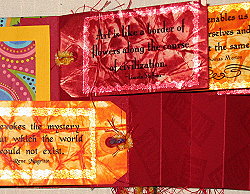
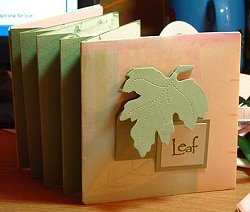
Examples
Evelyn Spikes
.jpg)
Evelyn Spikes
.jpg)
Evelyn Spikes
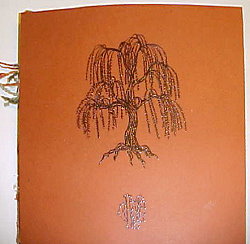
Georgia Wood
Georgia Wood
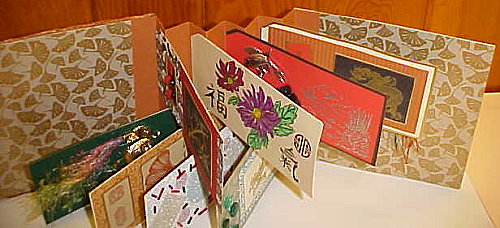
Georgia Wood
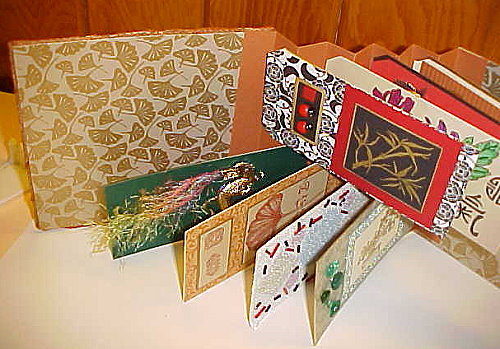
Georgia Wood