Post It Note (PIN) Purses

By Katrina Merryman
Supply List:
- Cardstock
- O'So Sticky Tape
- Micro Beads
- ATG
- Stamps & Ink
- Hole Punch
- Ribbon or Fiber for "handle"
- Post It Note pad
- Card Template

Directions:
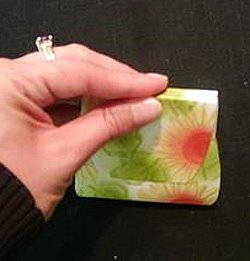
Step 1:
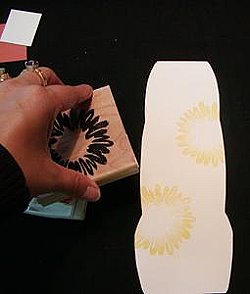
Stamp on one side of template with your choice of stamps.
Stamp on one side of template with your choice of stamps.
Step 2:
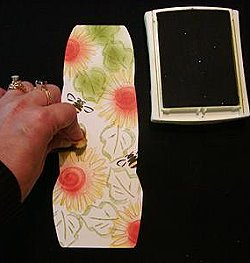
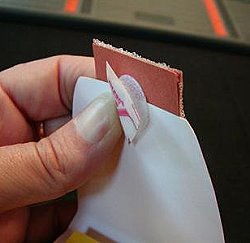
If you want to do the Burnishing technique - just take a sponge and ink it up and rub - literally grind the ink into the paper.
Also - if you're totally bead crazy like me you can cut a sheet of O’So Sticky Tape the same as the template and bead the whole darn thing.
If you want to do the Burnishing technique - just take a sponge and ink it up and rub - literally grind the ink into the paper.
Also - if you're totally bead crazy like me you can cut a sheet of O’So Sticky Tape the same as the template and bead the whole darn thing.
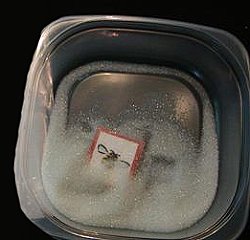
Step 3:
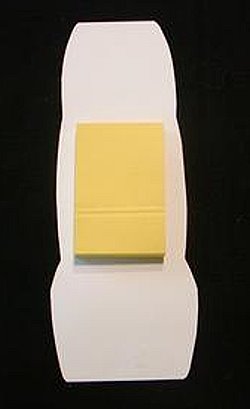
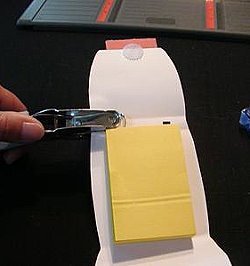
Put ATG or similar adhesive on the back of the Post-It-Notes and stick in middle (lengthwise and widthwise) of template.
Put ATG or similar adhesive on the back of the Post-It-Notes and stick in middle (lengthwise and widthwise) of template.
Step 4:
Fold template over P-I-N so that larger section is on the bottom and smaller section is on the top and make creases where edges are (top and bottom).
Fold template over P-I-N so that larger section is on the bottom and smaller section is on the top and make creases where edges are (top and bottom).
Step 5:
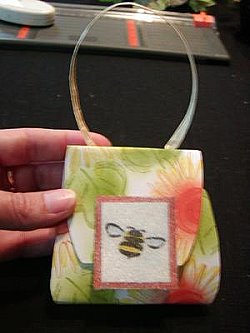
Stamp a coordinating image on a separate 1 inch or smaller square of paper and mount on coordinating color. Cut O’So Sticky Tape same size as mounted image and bead with clear or translucent colors.
Stamp a coordinating image on a separate 1 inch or smaller square of paper and mount on coordinating color. Cut O’So Sticky Tape same size as mounted image and bead with clear or translucent colors.
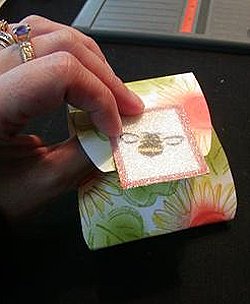
Step 6:
Mount beaded square on top (smaller) flap with ATG or similar adhesive leaving about 1/3 hanging over the edge.
Mount beaded square on top (smaller) flap with ATG or similar adhesive leaving about 1/3 hanging over the edge.
Step 7:
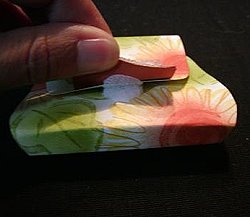
Now here's the tricky part... take the Velcro dot and put both sides together - Velcro together with sticky parts on outside. Then peel one side off exposing sticky and stick to top flap. Leaving dots together peel other sticky off and close the flap - making sure to position the way you want it to look when the purse is closed. And voila - dots match up perfectly and now purse will open and close time and time again.
Now here's the tricky part... take the Velcro dot and put both sides together - Velcro together with sticky parts on outside. Then peel one side off exposing sticky and stick to top flap. Leaving dots together peel other sticky off and close the flap - making sure to position the way you want it to look when the purse is closed. And voila - dots match up perfectly and now purse will open and close time and time again.
Step 8:
Punch two holes, fairly evenly spaced, in the top crease of the Purse (this nifty little option was devised by Cyndee Rust - my thanks - it looks way cooler).
Punch two holes, fairly evenly spaced, in the top crease of the Purse (this nifty little option was devised by Cyndee Rust - my thanks - it looks way cooler).
Step 9:
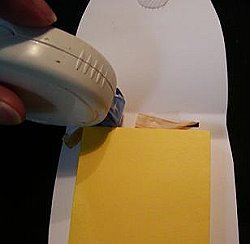
Thread ribbon through each hole and secure with ATG or similar adhesive on inside crease of Purse.
Thread ribbon through each hole and secure with ATG or similar adhesive on inside crease of Purse.
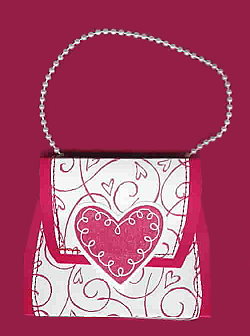
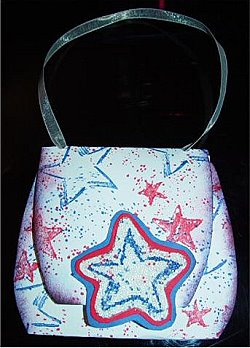
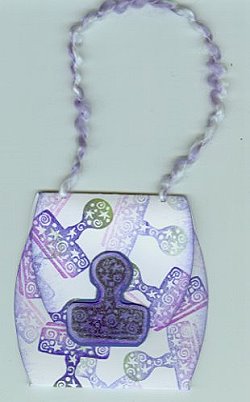
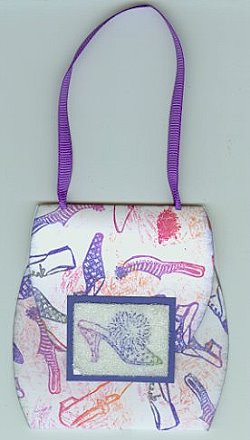
Examples

Suzanne Glazier
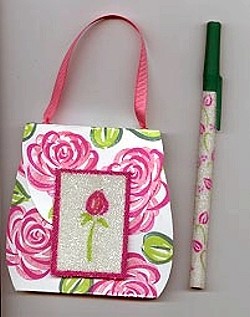
Cyndee Rust
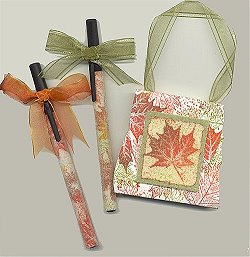
Eunice Creswell