Captured Beads

By Michele Aiello-Zendejas
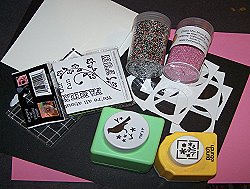
Supply List:
- Cardstock
- Picture Windows
- Paper punch or stickers
- Vine or Flourish Stamp
- Permanent Ink (coordinating color)
- Coordinating color permanent marker to match your ink
- Pennywise Arts Micro Beads
- Pennywise Arts 1/8" O'So Sticky Tape
- Paper Trimmer
- Optional: Post It note for masking

Directions:
Step 1:
Gather your supplies. Choose the rubber stamp(s) you want to use, cardstock, and coordinating micro beads. Cut your base cardstock to 4 1/4 x 11", then fold in half so the fold is on the top.
Gather your supplies. Choose the rubber stamp(s) you want to use, cardstock, and coordinating micro beads. Cut your base cardstock to 4 1/4 x 11", then fold in half so the fold is on the top.
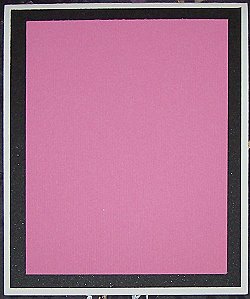
Step 2:
Cut and layer your coordinating cardstock. I used a 4 x 5 1/4" black piece of cardstock and a 3 1/2 x 4 1/4" piece of pink cardstock.
Cut and layer your coordinating cardstock. I used a 4 x 5 1/4" black piece of cardstock and a 3 1/2 x 4 1/4" piece of pink cardstock.

Step 3:
Stamp image.
Stamp image.
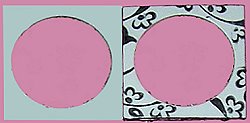
Step 4:
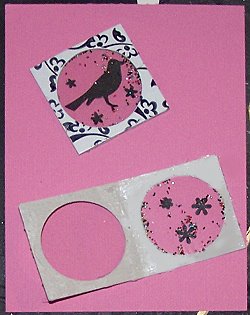
Cut a Post It Note to fit the opening of the Picture Window. Use the Post It note to mask the window so you don't get any ink on it when you stamp the image. Stamp the image, then use a permanent marker to color the edges of the picture window. You can also run the edges against your ink pad.
Cut a Post It Note to fit the opening of the Picture Window. Use the Post It note to mask the window so you don't get any ink on it when you stamp the image. Stamp the image, then use a permanent marker to color the edges of the picture window. You can also run the edges against your ink pad.

Step 5:
Adhere paper punched shaped or stickers to the inside of the picture window.
Apply adhesive around the frame.
Adhere paper punched shaped or stickers to the inside of the picture window.
Apply adhesive around the frame.
Step 6:
Sprinkle micro beads into the middle of the picture window. Try not to get any on the adhesive. Gently fold over the picture window to secure it closed and get the beads "captured" inside. Then adhere your Captured Beads Picture Windows to your card!
Sprinkle micro beads into the middle of the picture window. Try not to get any on the adhesive. Gently fold over the picture window to secure it closed and get the beads "captured" inside. Then adhere your Captured Beads Picture Windows to your card!
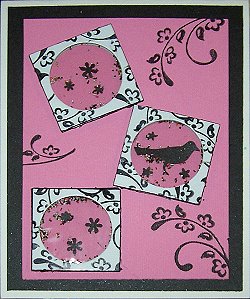
Examples
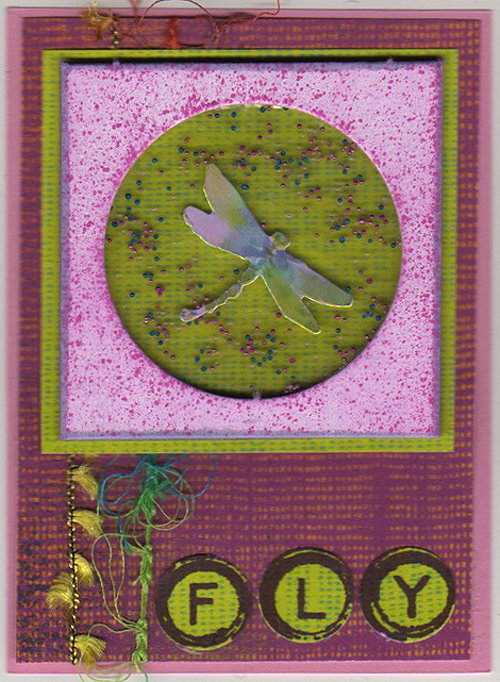
Suzanne Glazier
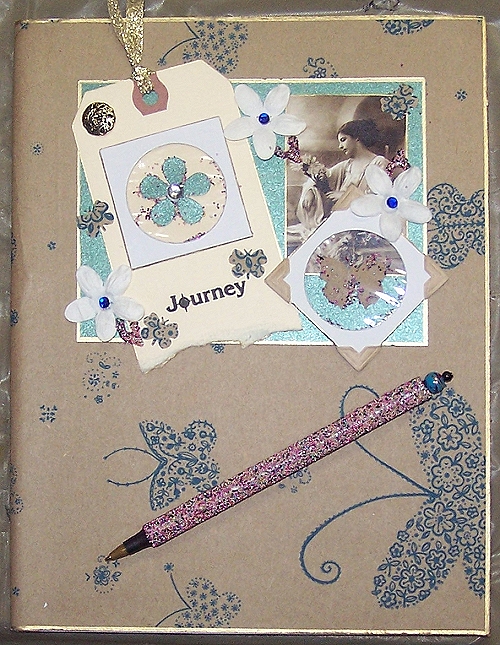
Michele Aiello-Zendejas