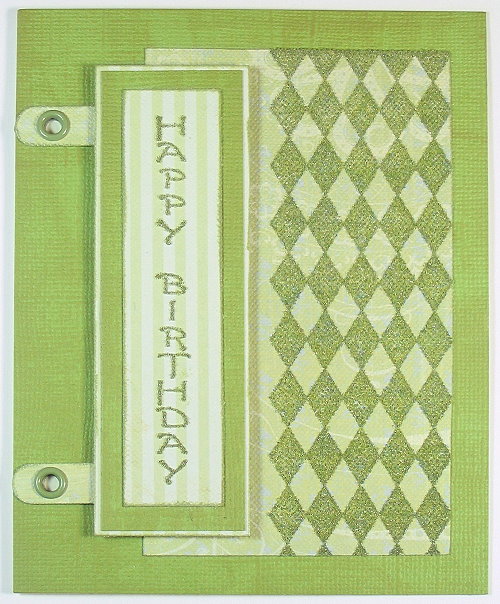
Beaded Birthday Greetings

By Julie Imsland
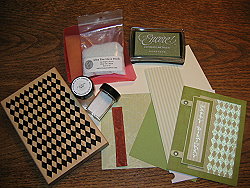
Supply List:
- Coordinating Cardstock
- Pennywise Arts O'So Sticky Powder
- Rubber Stamps: Vertical Birthday, #996-D by Sweet Impressions and the Diamond Background: #V2-817 by Stampers Anonymous.
- Pennywise Arts Ultra Fine Micro Beads
- Embellishments such as eyelets, etc.
By Julie Imsland

Directions:
Note:
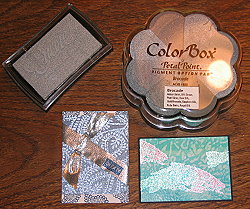
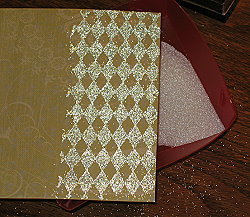
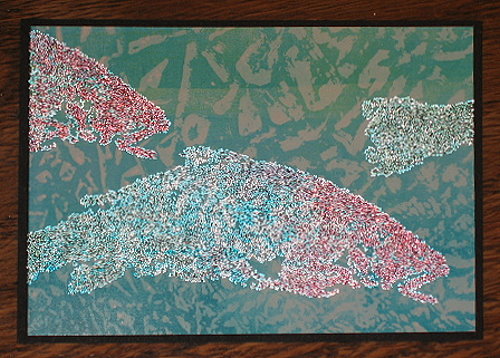
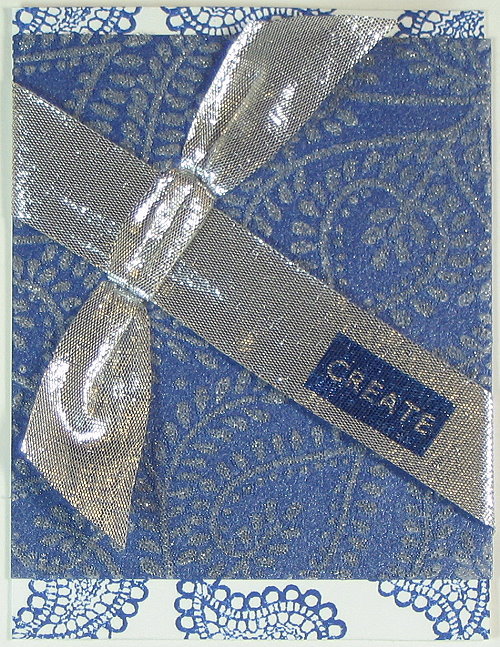
Micro beads add texture and interest by using O' So Sticky Powder from Pennywise Arts! O'So Sticky Powder is a heat activated glue powder that is used like embossing powder to make an image sticky - perfect for adding Ultra Fine Micro Beads.
I love using O'So Sticky Powder to adhere beads for focal images or backgrounds. Generally speaking, designs with bold lines work best, but as you can see from the examples, finer images can also yield wonderful results. Clear embossing ink will provide a tone-on-tone effect, while colored and metallic inks will give added contrast and design options.
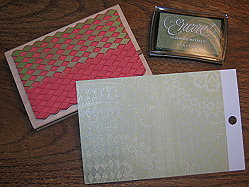
Step 1:
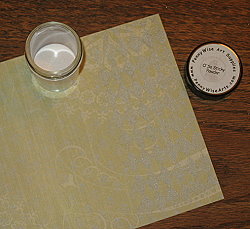
Use pigment ink to stamp image on desired paper. This sample used Encore Honeydew Ultimate Metallic ink by Tsukineko.
Use pigment ink to stamp image on desired paper. This sample used Encore Honeydew Ultimate Metallic ink by Tsukineko.
Step 2:
Sprinkle image with O'So Sticky Powder. Tap off excess and return to jar.
Sprinkle image with O'So Sticky Powder. Tap off excess and return to jar.
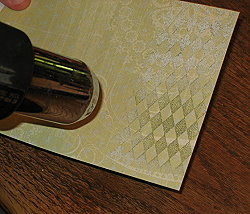
Step 3:
Heat (as you would embossing powder), just until the powder melts and turns shiny in appearance.
Heat (as you would embossing powder), just until the powder melts and turns shiny in appearance.
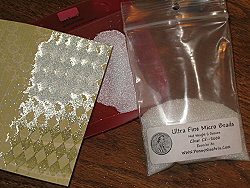
Step 4:
Pour micro beads over the melted O'So Sticky Powder, tap off excess.
Pour micro beads over the melted O'So Sticky Powder, tap off excess.
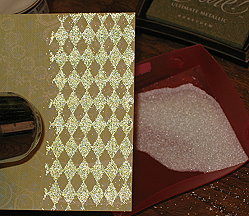
Step 5:
Heat the beads again briefly to "set" the beads (perhaps 10 seconds), you may see a very subtle change in the look of the beads once they are completely adhered with the powder. Allow the beaded image to cool before touching.
Heat the beads again briefly to "set" the beads (perhaps 10 seconds), you may see a very subtle change in the look of the beads once they are completely adhered with the powder. Allow the beaded image to cool before touching.
Step 6:
Once cooled, you should be able to touch the beaded image and the beads will remain perfectly adhered to your cardstock.
You can trim your beaded image with either scissors or a paper cutter.
Once cooled, you should be able to touch the beaded image and the beads will remain perfectly adhered to your cardstock.
You can trim your beaded image with either scissors or a paper cutter.

Examples
Julie Imsland
Julie Imsland